Getting started with SimpleOne Home Inventory Manager
This app is a standard Universal Windows App and can be installed and uninstalled similar to other Windows 10 apps. Like other apps on the Microsoft Store, the installation and removal process is managed entirely by Windows (this app does not have its own custom installer/uninstaller)

How to install:

Direct Microsoft Store link:
Download
SimpleOne Home Inventory Manager from the Microsoft Store

Alternatively, you can manually locate this app with the following steps:
  • Click on the Start menu
  • Launch the Microsoft Store App
  • Search for "SimpleOne Home Inventory Manager"
How to uninstall:
To uninstall an app:
- Click on the Start menu, right click on the App Icon and choose "Uninstall".

You can find detailed instructions from Microsoft's
official support site.
  • Open "Add new item"
  • Fill in new item information and choose "Save"
  • You can make updates and delete item at any time
  • Open "Browsed saved items"
  • Select the item name you wish to update
  • Make updates and go to Command Bar > "Update"
  • image files in jpg, jpeg, png and tiff format
  • pages from PDF documents (this adds a single page at a time, note you will not be able to tag an entire PDF manual at once)
Please note if you select a PDF document, you will be prompted to select a specific page from the document. The selected page will be added to your inventory item. When you generate a backup of media files associated with your inventory, this page will be available in image format.
  • Open "Browse saved items"
  • Select the item name you wish to delete
  • Go to Command Bar > "Delete"
  • Confirm delete
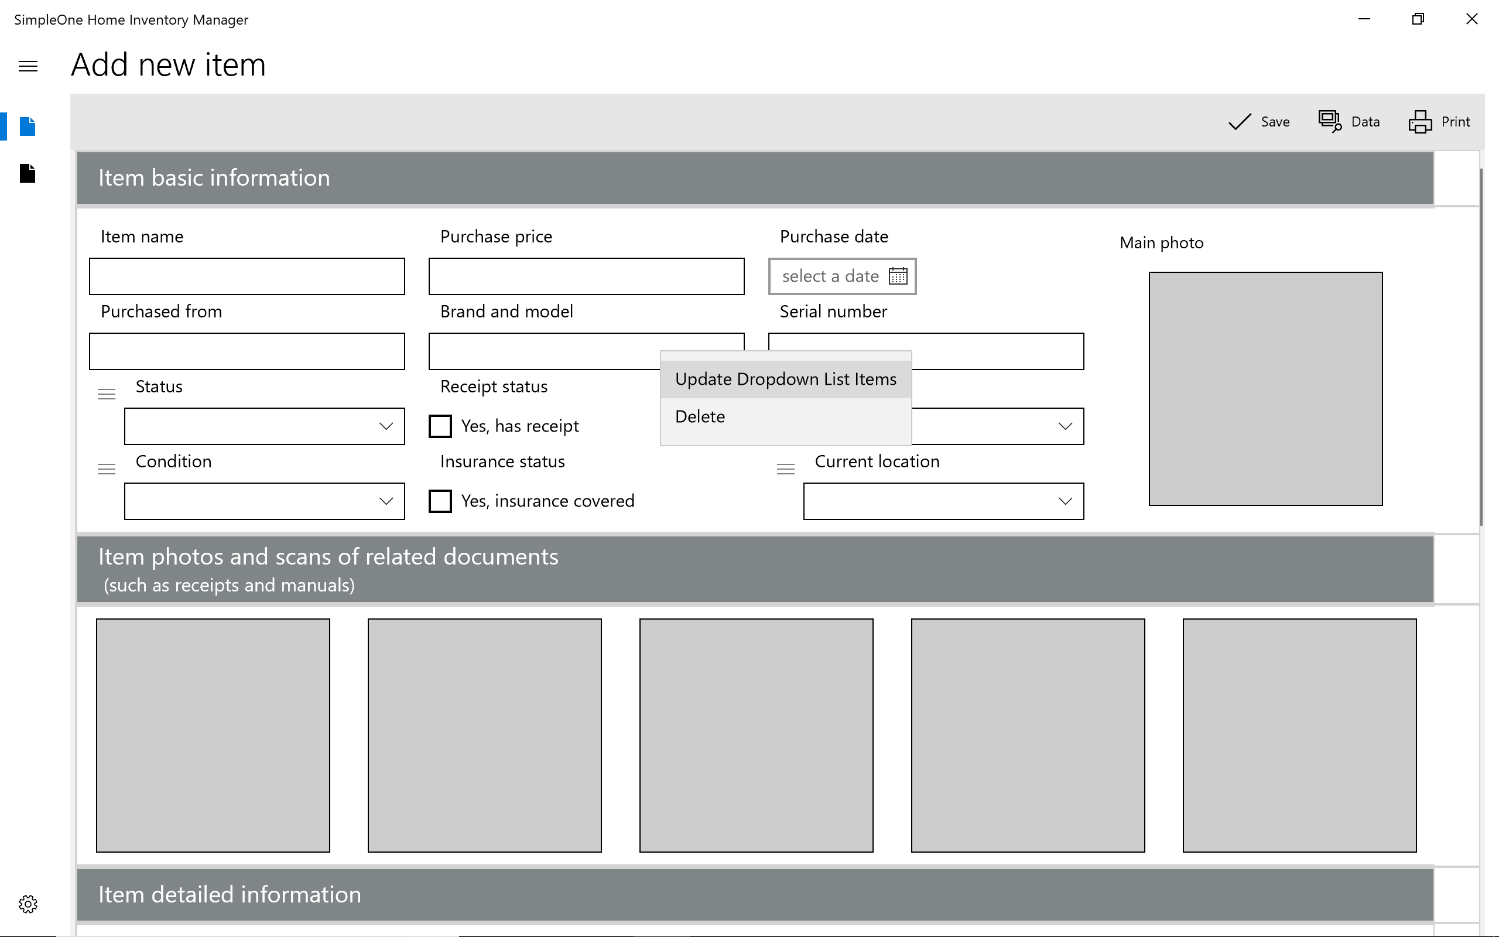
A dropdown list makes it easy to quickly choose a value from a list of options. Customize the list options helps you personalize your lists. For example, customizing "Current Location" allows you to customize the options to match available locations in your inventory.

  • Click on the dropdown list edit button (this looks like a menu icon with three horizontal bars)
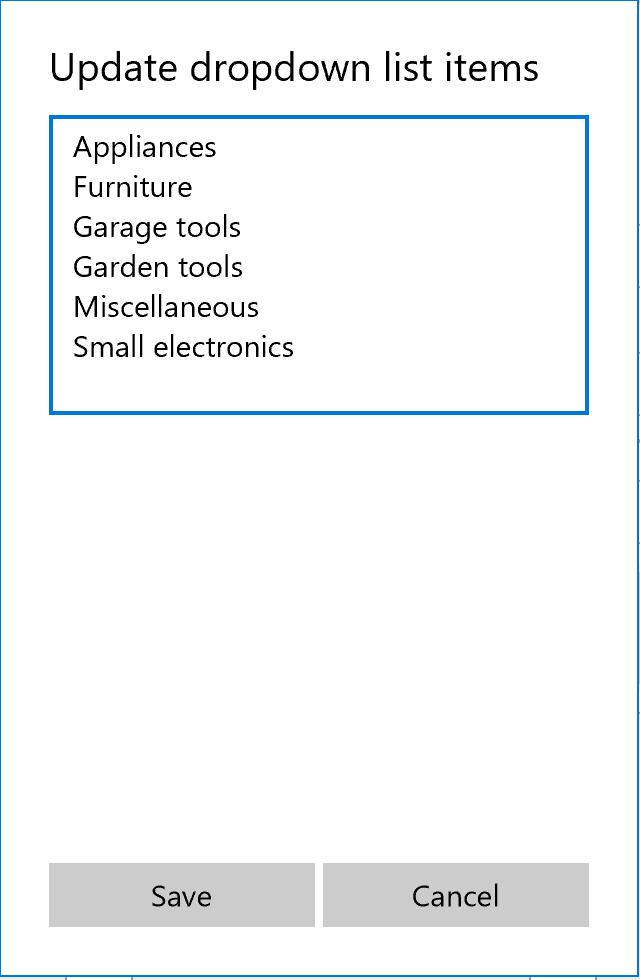
  • Choose "Update dropdown list items"
  • Edit dropdown list values, one item per line
  • Save
  • Open "Browsed saved items"
  • Select item
  • Click on photo to enlarge photo
  • Choose "Export Image" and save photo file
  • Open "Add new item"
  • Go to Command Bar > "Data"
  • Go to Command Bar > "Export"
  • Choose "Export photos"
  • This action exports a zipped file with all saved inventory photos
  • Single click on photo placeholder to add new photo
  • Right click on a photo and choose "Clear Image" to remove photo
Go to "Add New Item" > "Data" to view saved inventory in grid format. You can click on each column header to sort by the selected column. For example, selecting the “Item name” column will sort the items in alphabetical order by name.

The default data view presents saved items as ordered by the “record key” in the database. This record key is generated based on the order the items are entered.
To print out selected columns from your inventory, please see steps below:
  • Open “Add new item”
  • Go to command Bar > “Data”
  • In Data view, go to command bar > “Print” > “Print Settings”
  • Select the columns you wish to print, unselect all the ones you do not want
By default, all the administrative columns are deselected. Administrative columns include information such as timestamps and record IDs.

Print layout limitations:
  • The print layout is limited by the size of the paper
  • Putting the paper in landscape orientation will allow more columns to fit on the page
  • Exporting data to CSV and printing from a spreadsheet program such as Excel will allow more formatting options
  • Open "Add new item"
  • Go to Command Bar > "Data"
  • Go to Command Bar > "Erase Data"
  • Confirm to proceed with erase
"Erase data" removes all saved inventory items in the app, this action can not be undone.

If you wish to import new data and reset existing data, please perform a data erase first and then import data.
  • Open “Add new item”
  • Go to Command bar > “Data”
  • From the data view, go to command bar > “Backup”
  • Choose “Generate backup”
This creates a backup in this app’s own format, you can use this backup file when you restore data back into the app.

You can also use this backup option to manually transfer data between different devices.
In order to restore backups, you need to have a backup file that had been previously generated from this app. (This is a file with “backup” extension)

  • Open “Add new item”
  • Go to Command Bar > “Data”
  • From the data view, go to command bar > “Backup”
  • Choose “Restore backup
  • Open "Add new item"
  • Go to Command Bar > "Data" to launch record data view
  • Go to Command Bar > "CSV" > "Export to CSV" to save text data in CSV format
Exported CSV data can be opened in any spreadsheet program. This file is in text format and contains the photo file names (instead of the images). You can export saved photos separately.
If you are just getting started with this app, you may find it helpful to export the existing inventory items to create a sample CSV file.

Create a sample CSV file for reference:
  • Save at least one inventory item
  • Go to Command Bar > "Data"
  • Select "CSV"> "Export to CSV" and save exported CSV file
  • Open "Add new item"
  • Go to Command Bar > "Data" to launch record data view
  • Go to Command Bar > "CSV" > "Import"
  • Select file in CSV format and choose "Open"
  • Check the "Import" checkbox for each column you wish to import
  • Match CSV file column with import data column
  • For columns containing dates, please set the column format to "Date" and format the data as a timestamp "mm/dd/yyyy hh:mm" (example: 4/26/2019 20:14)